描画とグラフィックス
注釈
ここで「Drawings」や「Graphics」という用語が言及されている場合、それは「ベクトルグラフィックス」や「線画」を指しています。
したがって、これらの用語を同義語として考えてください。
PDFファイルは、その構文の一部として基本的な描画操作をサポートしています。これらは**ベクトルグラフィックス**であり、線、曲線、円、長方形などの基本的な幾何学的オブジェクトを含み、色の指定も可能です。
このような操作の構文は、Adobe PDFリファレンス の「A Operator Summary」のページ643で定義されています。PDFページのためのこれらのオペレータは、その内容 (contents)オブジェクト内で指定されます。
PyMuPDFは、 Shape(シェイプ) クラスを介して利用可能な多くの機能を実装しており、これは他のパッケージ(例: reportlab など)の「キャンバス」のような概念と類似しています。
シェイプは常にページの子として作成され、通常は shape = page.new_shape() のような命令で行います。このクラスは、ページの領域に描画操作を実行するための多数のメソッドを定義しています。たとえば、 last_point = shape.draw_rect(rect) は、適切に定義された rect = pymupdf.Rect(…) の境界に沿って四角形を描画します。
返されるlast_pointは常に描画操作が終了する Point (ポイント) (「最後のポイント」)です。このような基本的な描画ごとに、それを「閉じる」ために Shape.finish() が必要ですが、1つの共通の``finish()``メソッドを持つ複数の描画があるかもしれません。
実際には、 Shape.finish() は、1つの(潜在的に非常に複雑な)グラフィックオブジェクトを形成するための前の描画操作のグループを定義します。PyMuPDFは、これがどのように機能するかを示す shapes_and_symbols.py 内のいくつかの事前定義されたグラフィックスを提供しています。
このスクリプトをインポートすると、次の例のようにそのグラフィックスを直接使用することもできます:
# -*- coding: utf-8 -*-
"""
Created on Sun Dec 9 08:34:06 2018
@author: Jorj
@license: GNU AFFERO GPL V3
Create a list of available symbols defined in shapes_and_symbols.py
This also demonstrates an example usage: how these symbols could be used
as bullet-point symbols in some text.
"""
import pymupdf
import shapes_and_symbols as sas
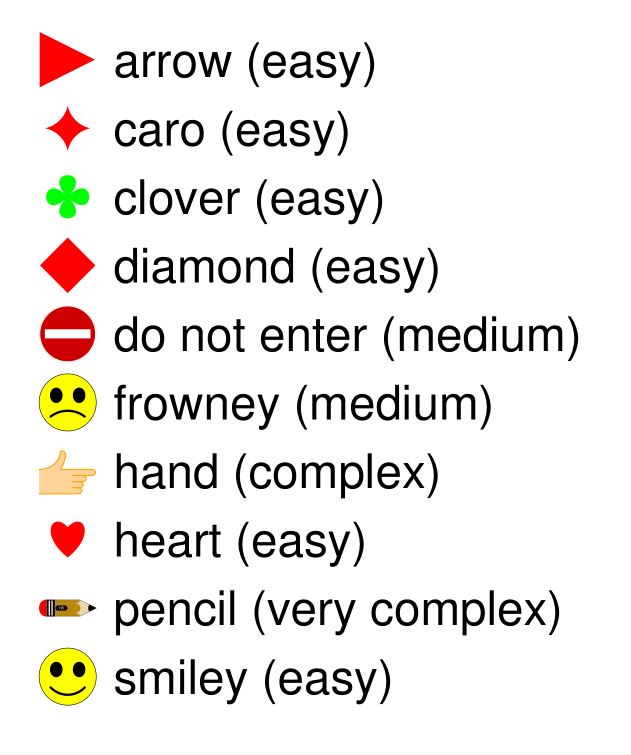
# list of available symbol functions and their descriptions
tlist = [
(sas.arrow, "arrow (easy)"),
(sas.caro, "caro (easy)"),
(sas.clover, "clover (easy)"),
(sas.diamond, "diamond (easy)"),
(sas.dontenter, "do not enter (medium)"),
(sas.frowney, "frowney (medium)"),
(sas.hand, "hand (complex)"),
(sas.heart, "heart (easy)"),
(sas.pencil, "pencil (very complex)"),
(sas.smiley, "smiley (easy)"),
]
r = pymupdf.Rect(50, 50, 100, 100) # first rect to contain a symbol
d = pymupdf.Rect(0, r.height + 10, 0, r.height + 10) # displacement to next rect
p = (15, -r.height * 0.2) # starting point of explanation text
rlist = [r] # rectangle list
for i in range(1, len(tlist)): # fill in all the rectangles
rlist.append(rlist[i-1] + d)
doc = pymupdf.open() # create empty PDF
page = doc.new_page() # create an empty page
shape = page.new_shape() # start a Shape (canvas)
for i, r in enumerate(rlist):
tlist[i][0](shape, rlist[i]) # execute symbol creation
shape.insert_text(rlist[i].br + p, # insert description text
tlist[i][1], fontsize=r.height/1.2)
# store everything to the page's /Contents object
shape.commit()
import os
scriptdir = os.path.dirname(__file__)
doc.save(os.path.join(scriptdir, "symbol-list.pdf")) # save the PDF
これがスクリプトの結果です:
描画の抽出方法
v1.18.0で新登場
ページから発行された描画コマンドを抽出できます。興味深いことに、これはすべての サポートされている ドキュメントタイプに対して可能です – PDFだけでなく、XPS、EPUBなどにも使用できます。
Page (ページ) メソッド、Page.get_drawings() は描画コマンドにアクセスし、それらをPythonの辞書のリストに変換します。各辞書 – 「パス」と呼ばれる – は個別の描画を表します – それは単純な単一の線であるか、前のセクションの形状の1つを表す線と曲線の複雑な組み合わせであるかもしれません。
パスの辞書は、 Shape(シェイプ) クラスとそのメソッドで簡単に使用できるように設計されています。以下は、1つのパスを持つページの例で、そのパスは Rect(100, 100, 200, 200) の内側に赤い境界線の黄色い円を描画します:
>>> pprint(page.get_drawings())
[{'closePath': True,
'color': [1.0, 0.0, 0.0],
'dashes': '[] 0',
'even_odd': False,
'fill': [1.0, 1.0, 0.0],
'items': [('c',
            Point(100.0, 150.0),
            Point(100.0, 177.614013671875),
            Point(122.38600158691406, 200.0),
            Point(150.0, 200.0)),
            ('c',
            Point(150.0, 200.0),
            Point(177.61399841308594, 200.0),
            Point(200.0, 177.614013671875),
            Point(200.0, 150.0)),
            ('c',
            Point(200.0, 150.0),
            Point(200.0, 122.385986328125),
            Point(177.61399841308594, 100.0),
            Point(150.0, 100.0)),
            ('c',
            Point(150.0, 100.0),
            Point(122.38600158691406, 100.0),
            Point(100.0, 122.385986328125),
            Point(100.0, 150.0))],
'lineCap': (0, 0, 0),
'lineJoin': 0,
'opacity': 1.0,
'rect': Rect(100.0, 100.0, 200.0, 200.0),
'width': 1.0}]
>>>
注釈
適切な精度で円を描画するには、(少なくとも)4つの3次ベジエ曲線が必要です。背景については、この Wikipediaの記事 を参照してください。
以下は、ページの描画を抽出し、それらを新しいページに再描画するコードの断片です:
import pymupdf
doc = pymupdf.open("some.file")
page = doc[0]
paths = page.get_drawings()  # extract existing drawings
# this is a list of "paths", which can directly be drawn again using Shape
# -------------------------------------------------------------------------
#
# define some output page with the same dimensions
outpdf = pymupdf.open()
outpage = outpdf.new_page(width=page.rect.width, height=page.rect.height)
shape = outpage.new_shape()  # make a drawing canvas for the output page
# --------------------------------------
# loop through the paths and draw them
# --------------------------------------
for path in paths:
    # ------------------------------------
    # draw each entry of the 'items' list
    # ------------------------------------
    for item in path["items"]:  # these are the draw commands
        if item[0] == "l":  # line
            shape.draw_line(item[1], item[2])
        elif item[0] == "re":  # rectangle
            shape.draw_rect(item[1])
        elif item[0] == "qu":  # quad
            shape.draw_quad(item[1])
        elif item[0] == "c":  # curve
            shape.draw_bezier(item[1], item[2], item[3], item[4])
        else:
            raise ValueError("unhandled drawing", item)
    # ------------------------------------------------------
    # all items are drawn, now apply the common properties
    # to finish the path
    # ------------------------------------------------------
    shape.finish(
        fill=path["fill"],  # fill color
        color=path["color"],  # line color
        dashes=path["dashes"],  # line dashing
        even_odd=path.get("even_odd", True),  # control color of overlaps
        closePath=path["closePath"],  # whether to connect last and first point
        lineJoin=path["lineJoin"],  # how line joins should look like
        lineCap=max(path["lineCap"]),  # how line ends should look like
        width=path["width"],  # line width
        stroke_opacity=path.get("stroke_opacity", 1),  # same value for both
        fill_opacity=path.get("fill_opacity", 1),  # opacity parameters
        )
# all paths processed - commit the shape to its page
shape.commit()
outpdf.save("drawings-page-0.pdf")
ご覧の通り、 Shape(シェイプ) クラスとの高い一致度があります。ただし1つ例外があります。技術的な理由から、ここでは lineCap は3つの数字のタプルですが、 Shape(シェイプ) クラス(およびPDF内)では整数です。そのため、そのタプルの最大値を単純に取得します。
以下は、前のスクリプトで作成された例のページの入力と出力の比較です。

注釈
ここに示されているようなグラフィックスの再構築は完璧ではありません。次の点は、このバージョンでは再現されません:
ページの定義は複雑になる可能性があり、特定の領域を表示しない/非表示にするための指示を含むことがあります。こうしたことは、
Page.get_drawings()によって無視されます – このメソッドは常にすべてのパスを返します。
注釈
パスのリストを使用して、ページ上のすべての線またはすべての四角形などのリストを作成し、色やページ上の位置などの基準でサブセレクトすることができます。
描画の削除方法
描画やベクトルグラフィックスを削除するには、その描画の境界ボックスを持つ 赤字アノテーション を使用し、それに赤字を 追加して適用する 必要があります。
以下のコードは、ページ上で最初に見つかった描画を削除する例を示しています:
paths = page.get_drawings()
rect = paths[0]["rect"]  # rectangle of the 1st drawing
page.add_redact_annot(rect)
page.apply_redactions(0,2,1)  # potentially set options for any of images, drawings, text
注釈
Page.apply_redactions() には送信できるパラメータオプションがあります。アノテーション領域によって境界付けられたイメージ、描画、テキストオブジェクトに削除オプションを適用できます。
グラフィックスを描画する方法
グラフィックスを描画することは、必要な 描画方法 の種類を呼び出すだけです。グラフィックスは、ページ上または形状オブジェクト内に直接描画できます。
例えば、円を描画するには:
# Draw a circle on the page using the Page method
page.draw_circle((center_x, center_y), radius, color=(1, 0, 0), width=2)

# Draw a circle on the page using a Shape object
shape = page.new_shape()
shape.draw_circle((center_x, center_y), radius)
shape.finish(color=(1, 0, 0), width=2)
shape.commit(overlay=True)
Shape(シェイプ) オブジェクトは、Shape.finish() で指定された共通のプロパティを受け取る必要がある複数の描画を組み合わせるために使用できます。